nodeJS (express Framework) + mongoDB (mongoose ODM)를 이용한 간단한 REST API 개발
node.js (express framewor) + mongoDB (mongoose ODM)

노드JS (express 프레임워크)와 mongoDB(mongoose ODM)을 이용해서 간단한 REST API를 만들어 보려합니다. 구현해보려는 내용은 아주 간단한데요 아래와 같습니다. (다음번에는 update랑 delete도 해볼게요…ㅠ)
- POST 요청을 통해서 data를 mongoDB에 저장한다 (locathost:4000/get/)
- GET 요청을 통해서 data를 mongoDB에서 가져와서 JSON 형태로 보여준다. (locathost:4000/post/)
자, 그럼 시작하기전에 간단한 유머입니다….(원래 이런유머 좋아해서 팀분들이 난처해 하신답니다…)

if ('moongoose' === 'bongoose') {
  console.log('bab buger');
} else {
  console.log('stop joke');
}
작업 환경은 cloud IDE인 c9.io를 이용하겠습니다.
먼저 저는 npm module로 아래와 같이 사용하고자 합니다.
- express module (express framework)
- body-parser module (POST 요청 데이터를 추출하는 미들웨어)
- mongoose module (mongoose ODM)
- nodemon (global로 설치)
먼저 npm init으로 package.json을 만들어서 의존성을 등록하겠습니다. 이렇게하면 나중에 git에 올릴때 node_module 폴더는 ignore(이근호 선수아닙니다…) 처리해도 좋겠죠?
> npm init
> npm install -g nodemon
> npm install --save express body-parser moongoose
다음으로 app.js에 서버를 만들어서 nodemon으로 서버를 올려보겠습니다.
- path : ./app.js
var express = require('express');
var bodyParser = require('body-parser');

var app = express();

// body-parser middleware 등록
app.use(bodyParser.json());
app.use(bodyParser.urlencoded({extended : true}));

// c9 linux 환경의 환경변수에 등록되어있는 PORT 번호 사용
var port = procee.env.PORT;

app.get('/', function (req, res, next) {
  res.send('hello node.js');
});

app.listen(port , function () {
  console.log('server is running on ' + port);
});
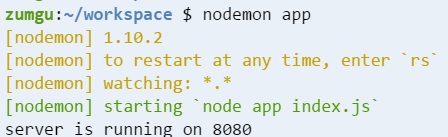
서버가 정상적으로 실행되면 위와 같은 화면이 보이고 해당 서버 주소로 접근시, hello node.js라는 메시지가 보일겁니다.
이제 서버를 올렸으니 mongoDB를 설치해보겠습니다. mongoDB는 아래와 같이 cli에 입력하면 됩니다.
// 몽고 DB 설치
> sudo apt-get install mongodb-org
// DB 폴더 (mongoDB 데이터가 이 폴더에 저장될것 입니다.)
> mkdir data
// mongod 라는 파일을 만드는데 이는 환경변수에 저장된 IP주소로 db는 data폴더를 쓰며 port도 환경변수에 저장된 포트를 사용해서 mongod로 mongodb를 실행한다는 뜻입니다.
> echo 'mongod --bind_ip=$IP --dbpath=data --nojournal --rest "$@"' > mongod
// 만든 파일을 실행가능한 파일로 변환해줍니다.
> chmod a+x mongod

> ./mongod
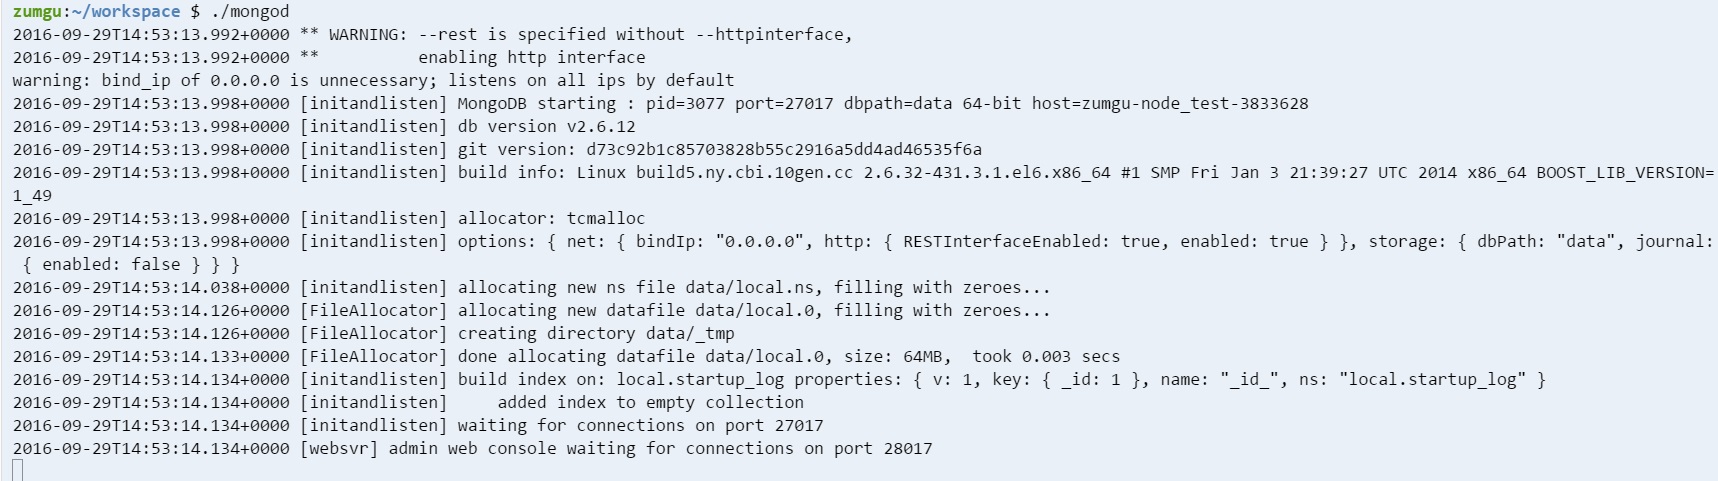
잘 실행되었다면 위와 같은 화면이 보일것입니다.
이어서 app.js에 mongodb를 mongoose ODM을 이용해서 연결하고, 사용할 스키마를 정의하고 모델을 생성하겠습니다.
var express = require('express');
var bodyParser = require('body-parser');
var mongoose = require('mongoose');

// 현재 서버의 data DB에 연결
mongoose.connect('mongodb://localhost/data');

var Schema = mongoose.Schema;
// 스미마 정의
var studentSchema = new Schema({
    name : String,
    email : String

    // name : {type : String, unique: true}
});

// 정의된 스키마를 토대로 모델 생성
var Student = mongoose.model("Student", studentSchema);

var app = express();

// body-parser middleware 등록
app.use(bodyParser.json());
app.use(bodyParser.urlencoded({extended : true}));

// c9 linux 환경의 환경변수에 등록되어있는 PORT 번호 사용
var port = procee.env.PORT;

app.get('/', function (req, res, next) {
  res.send('hello node.js');
});

app.listen(port , function () {
  console.log('server is running on ' + port);
});
마지막으로 위에서 생성한 모델 (Student)을 이용해서 POST 요청이 갔을때는 데이터의 저장 GET 요청이 왔을때는 데이터를 조회하는 부분을 추가 해보겠습니다.
var express = require('express');
var bodyParser = require('body-parser');
var mongoose = require('mongoose');

// 현재 서버의 data DB에 연결
mongoose.connect('mongodb://localhost/data');

var Schema = mongoose.Schema;
// 스미마 정의
var studentSchema = new Schema({
    name : String,
    email : String

    // name : {type : String, unique: true}
});

// 정의된 스키마를 토대로 모델 생성
var Student = mongoose.model("Student", studentSchema);

var app = express();

// body-parser middleware 등록
app.use(bodyParser.json());
app.use(bodyParser.urlencoded({extended : true}));

// c9 linux 환경의 환경변수에 등록되어있는 PORT 번호 사용
var port = procee.env.PORT;

app.get('/', function (req, res, next) {
  res.send('hello node.js');
});

// get 요청으로 DB의 데이터 가져옴
app.get('/students', function(req, res, next) {

    // model.find({검색 파라미터 (mongoQuery 문법 사용)}, function ("에러", 응답 받을 collection))
    Student.find({}, function (error, students) {
        if (error) {
            return res.json(error);
        }
        return res.json(students);
    });
});

// post 요청으로 DB에 데이터 저장
app.post('/students', function(req, res, next) {
    var name = req.body.name;
    var email = req.body.email;

    var student = Student({
        name : name,
        email : email
    });

    student.save(function (error) {
        if (error) {
            return res.json(error);
        }

        return res.send("Successfully Created");
    });
});

app.listen(port , function () {
  console.log('server is running on ' + port);
});
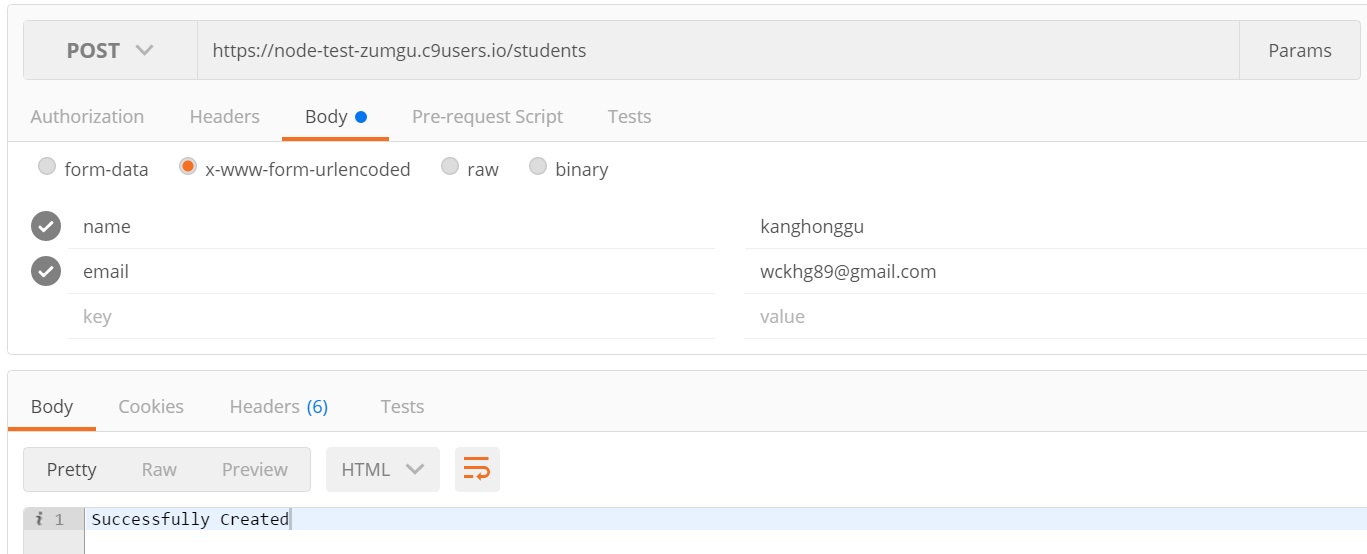
POST 요청으로 name과 eamil을 저장하였습니다.
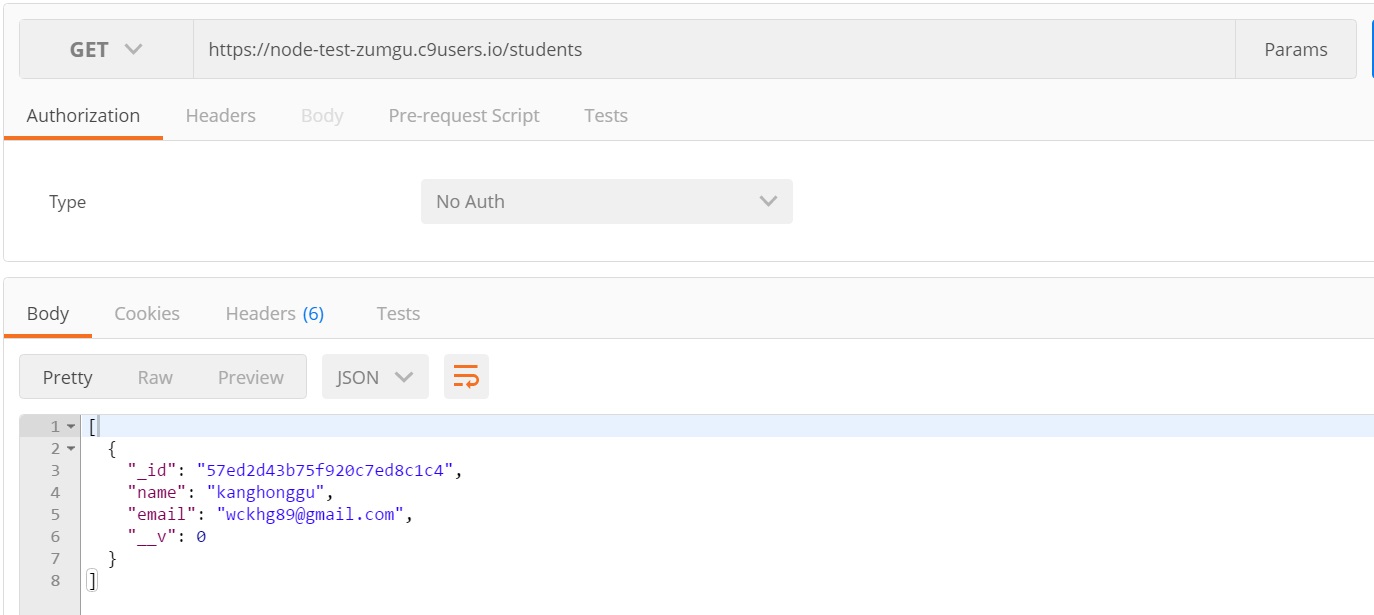
GET 요청으로 저장된 데이터가 잘 조회되는 것을 볼 수 있습니다.